How to install new LED lights on your aging boat and improve your comfort, convenience and safety.
This article focuses on the actual process of installing new LED Lights on your older boat. If you are unsure of your LED lighting options refer to our previous article.
Preparing For LED Light Installation
The first step is to identify where you want more or better light. If there is an existing light and you simply want to improve on it your job is pretty simple. If you want light in a location where there is none it gets a little more complicated.
I had both scenarios. I wanted to improve existing lighting and I wanted to add lighting in new locations. In either case it’s important to understand how your 12v DC lighting system works.
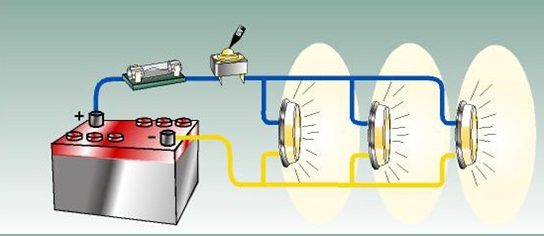
Most lighting systems in living spaces use a parallel circuit like the one above. This circuit allows the individual appliances to be switched on and off once the main circuit is switched on.
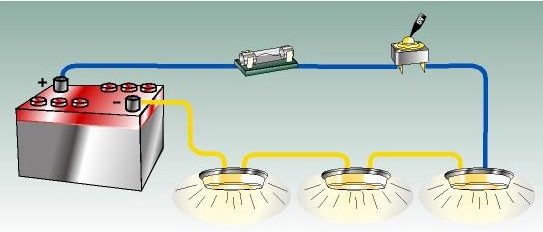
With a series circuit all appliances are either on or off. A series circuit is preferable in systems like the NAV lights, spreader lights or multiple lights in one cabinet.
Consider which circuit is preferred for a particular function before planning the installation.
Adding A New LED Light
Mai Tai was endowed with ample open space lighting. The majority of new wiring targeted enclosed spaces, like cabinets and closets. In these small spaces the series circuit makes the most sense.
Galley cabinets required at least two lights because shelving blocked the light. One light was placed above the shelf and one below. I don’t have any cabinets with more than one shelf.
Closets and storage compartments may also require more than one light depending on whether or not they have dividers.
Powering Your New LED Lights
Find a power source. You can either tap into an existing 12v line adjacent to where you’re installing new lighting or you can find a spot on your breaker/fuse panel and run a new dedicated line.
Tapping into an existing circuit has the benefit of keeping the job simple. No extra circuit breaker, no long wire runs. Less crawling around in confined spaces. And, it doesn’t matter if the circuit you tap in to is series or parallel.
Existing circuits on older boats were planned with incandescent lights in mind. They required far more power to run than today’s LED lights. Adding a few LED lights to an existing circuit should not over-tax the system. Especially if you have converted old fixtures in the circuit to LED’s. (Review our previous article on converting to LED Lights.)
If you need to run a new line to power a circuit find the closest sub-panel or a spot on the main breaker/fuse panel. Then plan the routing to your destination.
Be sure to secure wiring along the route so that it is out of the way and not subject to chaffing. I like to terminate my new wiring using a simple block like the one shown below.
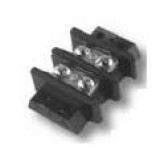
Connect the new lights directly from the terminal block. This block is best located close to the location of the new light. No matter what style LED light you’ve chosen it will require adding appropriate connectors (usually crimp on ring connectors). For marine use the tinned copper connectors with heat shrink covers are best.

Finish The LED Light Installation
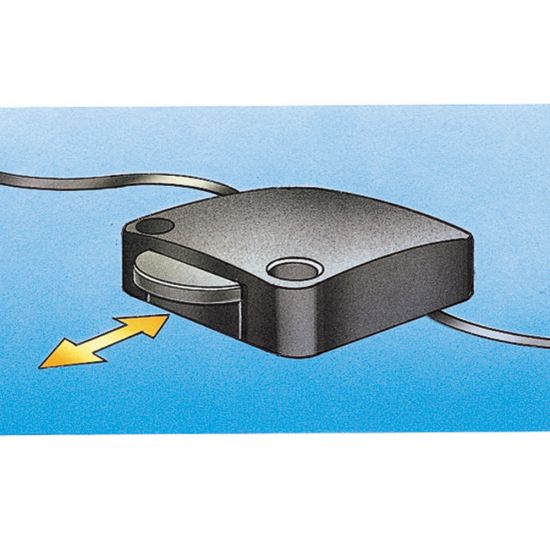
The last steps include installing a switch if your new light doesn’t have one built in. I used optical and mechanical switches. I recommend using a mechanical switch in lower cabinets.
The final step is the installation of the LED Light and connecting the wiring. This is the fun part. I recommend using spade connectors in case you have a light failure and need to replace it later.
That’s it! Turn on your new LED Light.
Trackbacks/Pingbacks